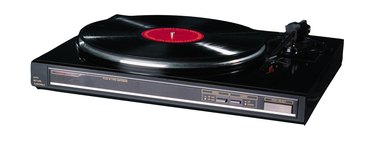
Grounding problems in audio gear are a major source of annoying hum and distortion. An undesirable phenomenon called "ground loop" results when the chassis connections of different pieces of equipment are not all at the same ground potential, or voltage. Your turntable, for example, must be grounded correctly to the amplifier to avoid noise and get the best sound from your system.
Step 1
Turn the power off to the amplifier and turntable. This precaution prevents loud, damaging noises in the speakers as you make connections and lowers the (already low) risk for electric shock.
Video of the Day
Step 2
Locate your turntable's grounding wire. It is typically connected to the underside of the metal turntable chassis and has an unconnected copper spade connector. Most turntable grounding wires are green, although yours may be a different color. On a new turntable, the wire may be folded underneath the chassis and wrapped with a twist tie. Unwrap the wire.
Step 3
Find the grounding terminal on your amplifier or receiver. It is typically on the back of the unit and clearly marked "ground." The terminal may be a metal post with a knurled shaft or a simple screw terminal. Loosen the grounding terminal.
Step 4
Make sure that the grounding wire can reach the amplifier's grounding terminal. Move your equipment to reduce the distance between turntable and amplifier if needed.
Step 5
Slip the ground wire spade connector onto the grounding terminal. Tighten the connection with moderate force; there is no need to over-tighten.
Step 6
Turn the power on to the amplifier and turntable. Your audio system is ready.
Video of the Day